Monday, December 23, 2013

Vegetable Minestrone Soup

Vegetable Minestrone
'Tis the season to be cooking. With the holiday season upon us and the prospect of many heavy meals to come, we thought it would be nice to whip up a batch of soup to serve as the basis for some lighter meals in and around the red meat fest set to commence shortly...

The basis of this was a Giada di Laurentiis recipe on a Food Network show we saw recently, but we made it from memory, and so I am not sure how closely what we made mirrors her recipe, but it is somewhat close.

Ingredients:

  • 3 carrots, medium dice
  • 3 ribs celery, medium dice
  • 3 medium potatoes, peeled, medium dice
  • 4 cloves garlic, minced
  • 1 can (15 oz) diced tomatoes
  • 2 cans (15 oz each) cannelini (white kidney) or great northern (white) beans, drained and split out as noted below
  • 1 medium plastic clam-shell package of "Power greens" (mix of spinach, chard and kale I think...)
  • 1 teaspoon dried thyme
  • 1 teaspoon dried crushed rosemary
  • 1/4 cup shredded parmesan, or a chunk of parmesan rind
  • Beef stock (one of the larger box cartons plus a little more)
The carrots, celery, potatoes and garlic are sweated in some olive oil in a large dutch oven (we used a big Le Creuset enamled cast iron one...my favorite pot).

While the veggies sweat, put about 2/3 of one can of white beans into a blender or food processor along with a cup or so of beef broth and puree them together. When then veggies are done sweating, add the diced tomatoes, the puree'd bean/broth mixture and the remaining white beans to the pot. Add the power greens (spinach/chard/kale), the thyme and rosemary and cover with beef stock. Simmer for 40 minutes or so. If you have a chunk of parmesan rind, add it prior to the simmering, it using shredded parmesan, hold off for now. The parmesan rind is really nice if you have it; it adds a richness and depth beyond what a simple sprinkling of shredded cheese will do (and it's the part of the cheese you can't really eat anyway...). It also adds some saltiness, so let it all cook out before checking for salt near the end.

At the end of 40 minutes, if using shredded parm, add it now and simmer for another 15 minutes or so. Total simmer time is close to an hour, although this is probably longer than you really need to cook the vegetables to doneness.

Test for salt and pepper, seasoning more if needed. Simmer a few more minutes and serve. (Because the carrots float more readily than some of the other veggies, the picture is a little misleading in making it look like chunky carrot soup...).

Sunday, December 22, 2013

Beef Stew

We have tried a number of different beef stew recipes over the years, and while some have been good and some have been not so good, we hadn't yet found one that really jumped out as the keeper for this dish. Until now.

Veggies, sauce base, and browned beef
As we continue to make recipes from Grace's subscription to the Food Network Magazine, we noticed a good looking beef stew recipe in the November 2013 issue (p. 210). We made it, and it was fantastic. Since it is readily available for free online (see link above), properly credited, I will repeat it in short form here. The recipe is fairly simple but cooks for a long time.

Ingredients:
  • 6 TB olive oil
  • 3 lbs beef chuck in 1 inch pieces
  • 4 carrots, 1 roughly chopped and 3 in half inch rounds
  • 4 stalks celery, 1 roughly chopped and 3 in half inch pieces
  • 1 onion roughly chopped
  • 1 TB tomato paste
  • 1 cup hearty red wine (I used an old vines Cotes du Rhone)
  • 2 quarts beef stock
  • 2 sprigs thyme
  • 1.25 lbs russet potatoes, in chunks
  • 1 lb mixed mushrooms (cremini, shitake, oyster etc)
  • 4 TB unsalted butter
  • 1/2 cup all purpose flour
  • chopped fresh parsley
Wine..some for stew, some for me
The meat is salt and peppered then browned in batches. Then the roughly chopped part of the carrot, celery and onion is put in the pot to soften. The tomato paste is added, then the wine. When boiling, the beef and stock and thyme are added to the pot. This is then simmered on low for about two hours to cook the beef to meltingly tender.

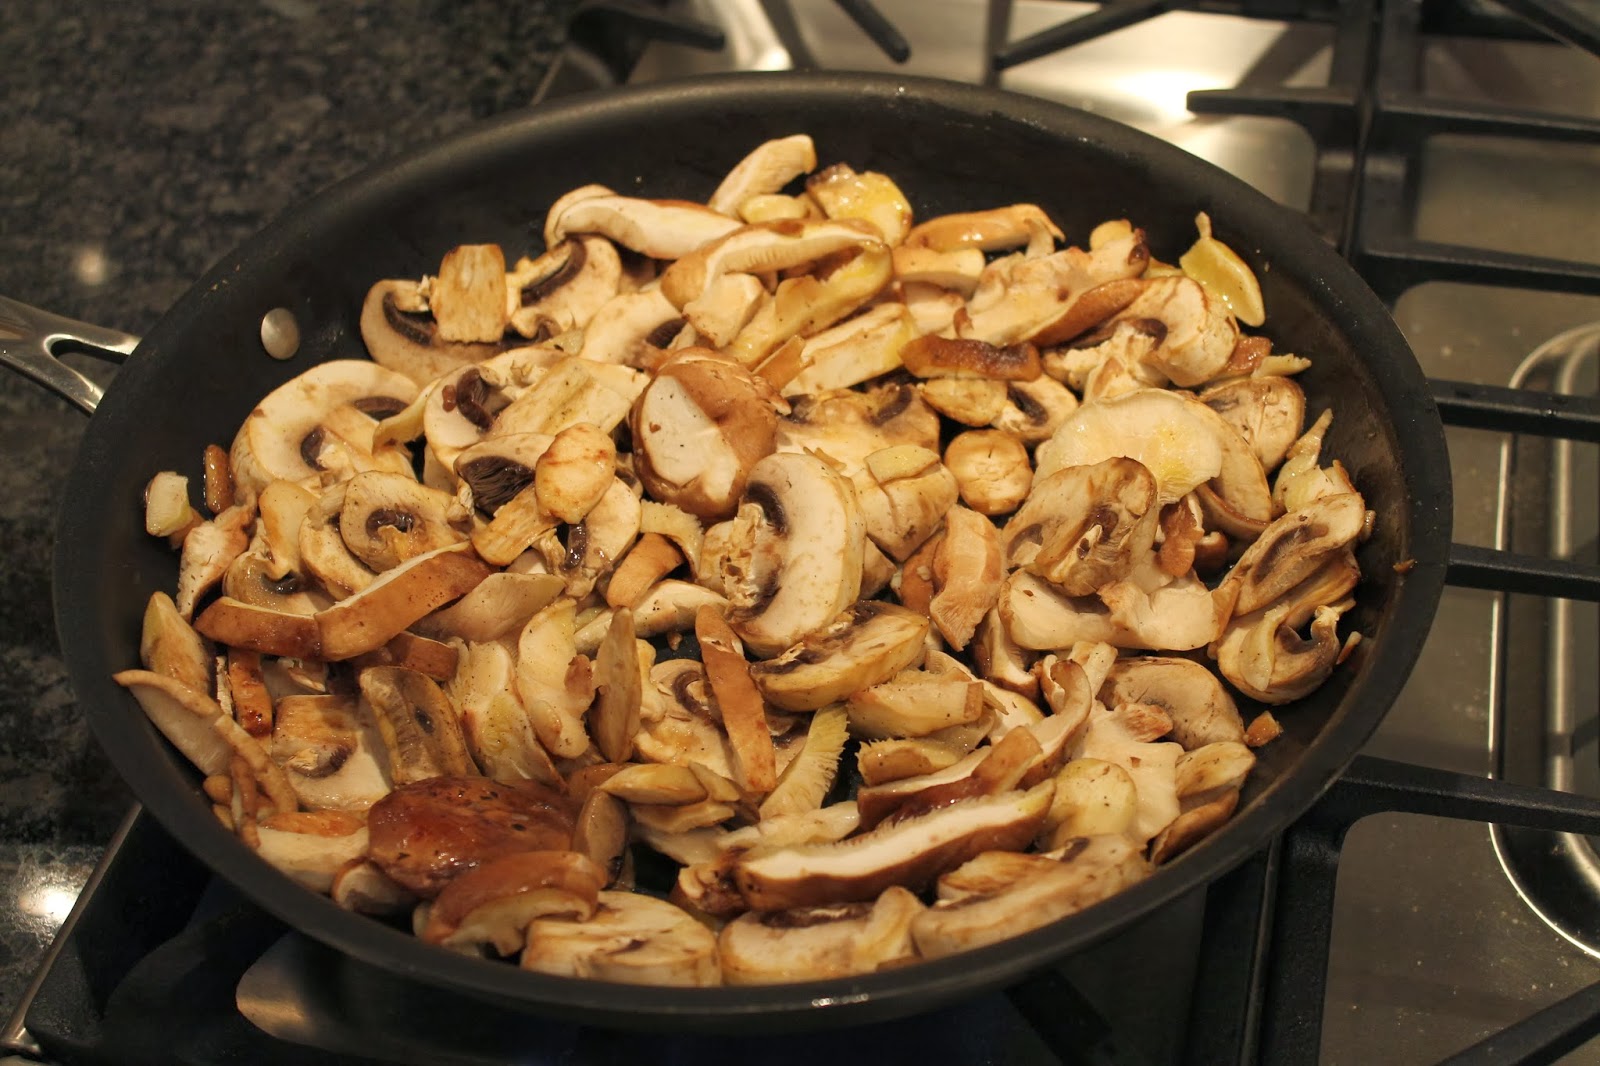
After this, they say to strain the beef and veggies into a colander, reserving the cooking liquid. The remaining veggies are then cooked in the liquid for 20 minutes or so. We cheated and simply added the veggies to the pot and simmered for another 20 minutes. Do what we did; you'll never notice the difference. Meanwhile, saute the mushrooms in a skillet for 10 minutes or so, seasoning with salt and pepper.

Lastly, make a blonde roux with the flour and butter, and whisk some of the cooking liquid into the roux. When incorporated, add the roux into the stew, stirring to distribute it. Add the cooked mushrooms. Simmer another 5 minutes or so to thicken the sauce and you are done. Garnish with chopped fresh parsley.
Lots of mushrooms

We had this with a nice crusty bread, a simple salad, and the remainder of the bottle of wine used for cooking. And maybe another bottle.
Finished Product

Prep time is maybe a half hour, but total cooking time is around 3 hours, so while this is not a difficult or overly fiddly recipe, it does take a good amount of time. It is well worth the effort. The assorted mushrooms really make a big difference in this richness of the overall flavor. Highly recommended.

Friday, December 13, 2013

White Chicken Chili

Another favorite kids' recipe is White Chicken Chili (p. 365, More Best Recipes, America's Test Kitchen, 2009). I generally make this on a weekend so that we can have leftovers for the work/school week ahead.

The recipe calls for browning chicken pieces, then making a thin salsa-like mixture of onions and different varieties of green chili peppers in a blender or food processor. The blender mixture goes back in the pot with more minced chilis, cumin, coriander and garlic.
Chili and onion base cooking down

This cooks for a while, then some of it goes back in the blender with some white beans, and gets pulsed again to break down the beans. This will help thicken the sauce so you don't end up with soup. The vegetable-bean mixture goes back in to the pot with stock, more whole white beans and the chicken to simmer until done. In the version in the picture I added a diced red bell pepper to add a splash of color.
Final simmering

Total cooking time is close to an hour and a half, but much of that time is different phases of simmering. As far as work goes, there is a decent bit of chopping, and there are a couple of different uses of the blender. It's not a difficult recipe by any means, but does require your attention for good portions of the cooking time. The spiciness can be adjusted depending on the types of green chilis you use. The dish can be garnished the same way you would for a beef chili: green onions, shredded cheese, sour cream, sliced jalapenos, etc.

Saturday, November 30, 2013

Thanksgiving 2013

Thanksgiving was at our house this year, with Mom and Chris, Dave, Lori, Sarah, Greta and Hailey joining us for a late afternoon dinner.

Grace has been enjoying her subscription to the Food Network Magazine this year, and the November issue was loaded with good looking recipes. We like to try different things as much as possible for most of the side dishes, so we ended up selecting about half the dinner out of that one magazine.

The Meal:

  • Turkey - A 22 pound Butterball fresh turkey simply roasted with salt, pepper, butter and oil in a Reynolds oven baking bag. Honestly, I hate cooking turkeys and want as little to do with them as possible. The bag cooking is a no-brainer and leaves the turkey almost infallibly moist and juicy.
  • Gravy - Simple pan dripping gravy (with Heinz jar backup)
  • Cranberry sauce - Cranberry Relish, Jasper White's Cooking From New England (HarperPerennial, 1989), page 341. I have been making this every time we have made Thanksgiving dinner for as long as I can remember. Sugar (caramelised), cranberries, orange, lemon and ginger. Best made the day before.
  • Stuffing - Bobby Flay's Wild Mushroom Bacon Sourdough Dressing. November 2013 Food Network Magazine, page 165. We try a new stuffing recipe most years, and this was perhaps my favorite in recent years.
  • Sweet potatoes - Whipped Sweet Potatoes and Bananas with Honey. November 2013 Food Network Magazine, page 157.
  • Roasted Potatoes with Sage. Recipe #47 in the "50 Side Dishes" insert booklet of the November 2013 Food Network Magazine. This is a four sentence recipe that couldn't possibly be easier.
  • Peas and Corn.

Everything came out well, with surprisingly little last-minute-scramble. It was nice to have everyone together for the holiday. The only down side was that Mom ended the evening not feeling very well and that cut the day short. She's doing fine now, which is terrific, but it did call a fairly abrupt end to the evening (for my side of the family). As the crowd was getting ready to leave, Amparo's sister and her family arrived for round two, and to stay for the weekend. It's very nice to have a bunch of family in the house.

Saturday, September 21, 2013

Eggplant Parm

Tonight I made a family staple, and a special favorite of Julia's, Eggplant Parmesan (or sort of). A true eggplant parm would probably involve breading, which mine doesn't, and a different mix of cheeses, but this is the version my family loves. Here's how I make mine.

Eggplant rounds frying
Ingredients and equipment:
  • 3 medium eggplant.
  • 1 jar good quality marinara, or homemade if you are feeling ambitious. I typically uses Newman's Own marinara, but Whole Foods' 365 brand isn't bad either.
  • 12-16 oz shredded mozzarella, depending on how heavy handed you want to be with the cheese.
  • 3 eggs.
  • 1+ cup flour, seasoned to taste with an assortment of salt, pepper, garlic powder, onion powder and Italian seasoning.
  • Olive oil.
  • Equipment - a large non-stick skillet, a large oval baker, a few flat bowls (I use a pair of soup bowls), and a cutting board.
The assembly line
The steps:
  1. Preheat the oven to 400 degrees (F).
  2. Cut the bitter ends off the eggplant, remove most of the skin (I like to leave a little for texture), and slice into 3/4 inch thick rounds.
  3. Beat three eggs in a shallow dish or work bowl.
  4. Make the seasoned flour in another flat work bowl.
  5. Put a good amount of olive oil in the skillet over high heat.
  6. Dip the eggplant slices into the seasoned flour, then into the egg, then into the skillet. Fry over medium-high heat until golden brown on both sides (flipping in the middle).
  7. Fry the eggplant in batches, adding more oil as needed (as the eggplant will soak up oil).
  8. As the eggplant batches are done, fill the casserole dish, layering as you go. A little sauce on the bottom, then fried eggplant, then a healthy sprinkling of shredded cheese, more sauce, more eggplant, etc.
  9. Make sure the top has sauce and cheese, adding some breadcrumbs if you wish.
  10. When assembled, bake the casserole in the 400 degree oven for about 45 minutes.
  11. Let it cool a little then eat. This time we had it with some simple spaghetti drizzled with olive oil, Italian seasoning and bread crumbs.
The finished product

Served with some pasta and a green salad, this serves our family for a couple of dinners plus maybe an individual lunch or two.

Sunday, September 1, 2013

Giada's Seafood Fra Diavolo

My sous chef Gracie and I were watching an episode of Giada at Home yesterday, and she made a dish that I knew (most) of my family would love; Seafood Fra Diavolo. It was a good episode, guest starring Bobby Flay, and had lots of good nuggets of information. The recipe on Foodnetwork.com is here. I made a mental note to remember to do this at home someday, and after a somewhat lazy day doing things around the house, decided that there is no time like the present.

The first step is to make a chili oil, infusing olive oil over low heat with a bunch of dried crushed red peppers. The tomato base of the sauce is then made by charring tomatoes and an Anaheim (mild green) chili on the grill (or a grill pan) with some salt and some chili oil.
Charred tomato and Anaheim chili

The split lobster tails are then boiled to begin cooking before they are finished in the pan. The linguine is then cooked in the lobster water...

After the lobster has been boiled to a mostly cooked state, it is put into the pan with the shrimp and cooked with some (you guessed it...) chili oil. When mostly cooked, but not completely, the shrimp and lobster are set aside, and the lobster meat is removed from the shell and chopped up.
Shrimp and Lobster

Meanwhile, oil, shallots, garlic and butter are added to a dutch oven or similar heavy pot to begin to brown gently. After a few minutes the white wine is added and the clams are put in to steam. After a few minutes more the tomatoes and chilies are added into the pot with the clams. Tap the clams to help them open (removing any that won't open). At the last moment, add the shrimp and lobster into the pot and then add the linguine and some grated parmesan just long enough to incorporate.
The end result

The end result is a very nice mix of seafood in a brothy sauce with chunks of tomato. It was not overly hot, but had a little zing to it. I would add a sprinkle of crushed red pepper on my plate. The three of us that I expected to love it did, and Gracie had leftover chicken curry from last night. Which is about what I expected would happen... As an aside, if you are looking for a Fra Diavolo with a red sauce, there is a ver good one in The Best Recipe (by the publishers of Cook's Illustrated).

Work - Moderate. This looked like a simple enough recipe on paper, and when they made it on TV it looked very easy (but then again with cuts and editing and a staff to help out, what doesn't). In reality, it wasn't too bad but was involved enough to rate as not easy.
Time - All told, this took in excess of an hour (as the recipe indicates) and I was busy most if not all of the time. This was not a "get it going and forget about it" recipe by any means.
Cleanup - Cleanup needs were moderate to high as I used a bunch of different bowls etc during the various stages. If I planned better I probably could have done a more efficient job, but in reality I didn't; there was a decent amount of cleanup, and a decent amount of stovetop splatter from all the chili oil cooking. There were shrimp to peel and devein, lobster tails to disect, clams to scrub etc...
Cost - Medium/High on cost. I made this with 2 small lobster tails, a dozen littleneck clams and 2/3 of a pound of medium sized shrimp. To moderate the cost somewhat you could skip the lobster and use more shrimp instead, but because of the fresh seafood you would have a hard time getting this into the "cheap/economical" category.
Rating - 7 out of 10 overall, but a weekend meal for sure. It tastes terrific but is not cheap, quick, or simple.

Vietnamese Chicken Curry

Last night we had arranged for brother Dave and his Darling Wife to come over for dinner, followed by some long-overdue guitar playing. I wanted something fun to make and a little off the beaten path, but not too difficult or requiring too much prep or cooking. The Labor Day holiday cookout at the neighbors will be a red meat fest, so I thought a chicken dish would be good (which is also in deference to Darling Wife's sensibilities). After some thought, I remembered a Madhur Jaffrey dish I had made once before that was very good, and not too involved.

The dish is Vietnamese Chicken Curry from page 94 of Jaffrey's From Curries to Kebabs; Recipes From the Indian Spice Trail (Clarkson Potter, 2003). I took the easy route and used boneless skinless thighs and breasts instead of bone-in pieces. First the chicken is rubbed with curry powder. Then a "blender paste" of shallot, ginger, garlic, crushed red pepper and lemongrass is made (with some water). Oil, cinnamon stick, bay leaf, lots of chopped onion and the paste make a base for this dish, to which is added diced tomato and then the chicken. After cooking for 7 or 8 minutes, potato, carrot, fish sauce, sugar and water are added, and then the dish is simmered for close to a half hour to cook everything through. In the last few minutes, coconut milk is added to make the richness of the sauce (salting to taste). We had it with simple green beans and of course lots of rice.

Work - Pretty easy. Chunk up some chicken, chop some veggies, throw some stuff in a blender, and then add stuff to a pot in batches. Nothing difficult here, and not overly fiddly.
Time - About an hour, start to finish, but only the first half of that requires active work, the last half hour is periodic stirring only.
Cleanup - Not bad at all. I used a blender, two cutting boards, a dutch oven and a few utensils and measuring stuff.
Cost - Fairly inexpensive. Needed to shop for chicken (about 3 lbs when doubling the recipe), some veggies and the coconut milk. All of the spices, fish sauce and other minor ingredients were pantry items for me.
Rating - 6.5 or 7 out of 10. A good solid coconut chicken curry. The flavor is good, with some heat (we moderated this for the kids). It's not a knock-your-socks-off recipe, but the good taste coupled with the relatively low cost and effort involved make this a keeper.

Saturday, August 10, 2013

Halibut with White Beans and Radicchio

Figuring we had eaten enough red meat for one week, I flipped through a few cookbooks today in hopes of finding a new seafood recipe that I thought everyone would like.

I ended up at Giada de Laurentiis' Sea Bass with Beans and Radicchio, on page 80 of Giada's Family Dinners. After a side trip to Home Depot to pick up a few items for a furniture refinishing project we are in the middle of, I stopped by Whole Foods to see what they had in the way of a nice white fish that would work well with this recipe. It came down to a choice between Chilean sea bass and halibut, and the halibut won.

It was an easy recipe to make, as many of Giada's are, but was absolutely fantastic. Even Grace loved it, and she's the one who claims she doesn't like fish. Tonight she did.

The recipe was simple, and in three easy parts. The halibut was served on a bed of white beans, shallots and wilted radicchio. The fish was dredged in flour, pan seared and then finished in the oven. The shallots were softened, to which the radicchio was added to wilt, after which the white beans were added along with some fish stock and salt and pepper. This was all simmered together while the fish cooked. After the dish was assembled, the fish was topped with a liberal spooning of a lemon vinaigrette. This was a simple blend of lemon juice, lemon zest, flat leaf parsley, garlic, salt, pepper and olive oil.

Giada's recipes continue to get very high marks from me. They are simple and straightforward to cook, but yield very good results without a whole lot of hassle. Perfect. You could do this dish on a weekday with no trouble. It gets very high marks for taste, ease of prep and minimal kitchen mess. The only downside is that halibut and sea bass are both pricey. To make this dish more economical, you could just as easily make it with snapper or tilapia or another less expensive white fish.

The entire meal took about a half hour to make. Highly recommended.


Sunday, June 2, 2013

Chicken Piccata

Mostly done...
Grace and I were watching Guy Fieri doing Diners, Drive-ins and Dives on the Food Network the other day, and they showed a guy making a simple chicken piccata. Even without a recipe, Grace and I looked each other and said "that looks good; we can make that!"

I intentionally avoided looking up a recipe ahead of time, wanting to see how good a job I could do from memory of watching the minute or so they showed on that one recipe during that one episode.

So the other night, we attempted the dish from memory, using this as our recipe:
  1. Heat a large skillet, then add 1 tablespoon butter and two cloves minced garlic (about 1 heaping teaspoon). Let the garlic get a little color (quickly) but don't let it burn. I added about a tablespoon of olive oil as well because I was concerned about burning the garlic and turning it bitter right out of the gate...
  2. Take 5 thin-sliced boneless chicken cutlets, dredged in seasoned flour (salt and pepper) and add them to the hot pan. Cook about 2 minutes per side, enough to brown them but not cook them through.
  3. Drain the pan of excess oil and greasy drippings.
  4. With the chicken still in the pan over high heat, deglaze the pan with 1 cup chicken stock, 1/2 cup dry white wine (I used a California chardonnay), and sprinkle with 1 tablespoon of all purpose flour. Bring this back to a boil, stirring a little so the flour doesn't clump.
  5. Lower the heat to medium, adding 2 tablespoons of drained capers and the juice of 1 lemon. Simmer 5 minutes on one side, flip the chicken, and simmer another 3 or 4 minutes on the other side, stirring occasionally so the sauce doesn't thicken unevenly. The sauce should thicken, but if it thickens too much, add a little more stock (I added a splash of stock a couple different times, making sure I ended up with a nice sauce consistency and not an overly thick glop). This should be enough to cook the thin chicken cutlets through, but nick and peek if necessary.
  6. Remove to plate and serve over linguine. The recipe should make just enough sauce to take care of the pasta (as long as you don't need your pasta drowning in sauce). A half pound of pasta did fine for us for this meal (half of a one pound package). [Keep in mind we are serving three, plus a smaller child who eats like a bird]
  7. Serving suggestion would be to arrange the lightly olive-oiled pasta on a platter, arrange the chicken on top, pouring the sauce over the chicken and letting it soak through to the pasta. Sprinkle with the juice of an additional lemon (see below) and garnish with chopped Italian parsley if you have it handy.
The recipe went over well. Everyone liked it. Making it again (and I will), I would tweak the above recipe as follows:
  • In step 1, I would double the garlic to 4 cloves and make the olive oil a definite. I love garlic...
  • In step 2, I will probably salt and pepper the chicken lightly before dredging in the seasoned flour  just to be sure I had enough seasoning on it.
  • In step 5, I would add the juice of two lemons, not just one. At the end, I would sprinkle the plated platter with the juice of a third lemon to give it a final touch of brightness (we all love lemon).
It feels good to be a knowledgeable enough home cook to be able to watch a recipe being made with no commentary on measurements for the ingredients but have a good enough feel for it to be able to recreate a recipe to an acceptable level. This is an easy dish well worth making.

Saturday, May 25, 2013

Baby Back Ribs

As I said earlier today, tonight was going to be baby back rib night. And so it was.

My rib recipe is very simple. Take baby back ribs at room temperature and sprinkle them liberally, top and bottom, with the barbecue rub recipe posted earlier today. Bake them slowly in a 250 degree oven for about two and a half hours.
On the grill...

Near the end of the oven baking time, preheat the grill 400 degrees. When done in the oven, slather the ribs top and bottom with a sweet barbecue sauce (I use Sweet Baby Ray's original recipe). The sweetness of the barbecue sauce is the perfect complement to the spiciness and mild heat of the dry rub. Start the ribs meaty side down for about 5 minutes, then flip to the bone side down for another 5 to 7 minutes, re-slathering the meaty side as necessary. The ribs are fully cooked at this point, and the only thing you are looking to do by putting the ribs on the grill with the barbecue sauce is to caramelize the sauce a little bit over a medium high heat. At the end of about 10-12 minutes total cooking time on a pretty hot grill, remove the ribs to a platter and let them rest for another 5 or 10 minutes. I like to slice them down and serve them on a platter as individual ribs (as shown below).
The finished product

Preferred accompaniments are corn on the cob and homemade spicy slaw. My favorite recipe for cole slaw is from Emeril Lagasse's first book, which I will write about soon. Tonight we slummed it a bit and went with store bought, but with good ribs I am not sure anybody noticed...

Barbecue Dry Rub

Tonight will be baby back ribs for the holiday weekend. The barbecue dry rub that I use for this (and for sprinkling on all sorts of other grilled stuff as well) is as follows. I make this in batches and keep it in the pantry for general purpose use. Well sealed it lasts quite a while since all ingredients are dry.

  • 1/2 cup roughly equal mix of chipotle chili powder, ancho chili powder and paprika (preferably smoked)
  • 2 Tbsp plus 1 tsp salt
  • 1 Tbsp ground black pepper
  • 1 Tbsp sugar
  • 1 Tbsp dried oregano
  • 2 tsp garlic powder
  • 2 tsp dried thyme
  • 1 tsp dry mustard
  • 1/2 tsp cayenne pepper

This recipe follows Rick Bayless' Hickory House dry rub recipe (p. 80) in the June/July 2004 issue (#76) of Saveur magazine fairly closely, changing a few proportions slightly and adding some mustard powder.

Prudhomme's Tomato Cream Chicken

Paul Prudhomme's Tomato Cream Chicken (from page 182 of his Fiery Foods That I Love) is my family's signature "special occasion" chicken dish. It is a somewhat involved recipe, not difficult necessarily, but one that takes some time and a lot of ingredients.

The base of the sauce is a seasoning paste made out of a whole bunch of stuff run through a blender with some chicken stock. It includes onions, peppers, raisins, pine nuts, garlic and a bunch of spices. This is then cooked down in a skillet for a half hour or so while the rest of the dish is worked on.
Seasoning paste at start
Seasoning paste after simmering 30 minutes

The chicken is boneless skinless breasts chunked into pieces, rubbed with a spice mix, browned (and cooked mostly through) and then removed from the pot. Lots of chopped onion is added to the pot drippings and softened. To this is then added more spice, diced tomatoes and the reduced seasoning paste. After this has cooked for a few minutes, lots of stock and heavy cream are added (yes, it's not the healthiest chicken dish in the world...).
Paste with onions, tomatoes and stock

Once this is back to a low boil, the chicken and accumulated juices are added back into the pot and simmered for another 10 to 15 minutes to make sure the chicken is cooked but not overcooked.
Sauce with stock, cream and chicken

The end result is is a richly flavored and complex sauce that has a little heat, but not too much, despite being in a "fiery foods" cookbook.
Tomato Cream Chicken

We always make a double batch for leftovers, and the recipe makes a lot of great sauce, so it is the perfect dish to serve with rice.

Wednesday, January 30, 2013

Penne with Sausage and Red Pepper Sauce

I worked at home today because of icy roads in the morning, so I was around to throw together a quick dinner. People wanted pasta, so they got this:
  • 2 hot Italian and 2 mild Italian sausage links, casings removed, broken up and then browned in a 5 qt dutch oven. Remove sausage to a bowl when browned.
  • To the pan drippings (with a splash of olive oil), add 1 medium onion (1 inch strips), 4 cloves of garlic (minced), 2 red peppers (1 inch strips) and 12-15 crimini mushrooms (rough chopped) and saute over medium-high heat for a 8-10 minutes until softened and the onions have some color on them. Add salt and pepper to taste as well as a teaspoon of dried oregano as they cook.
  • Add the sausage back into the pot along with two 28 oz cans of crushed tomatoes.
  • Depending on your heat tolerance, add as much crushed red pepper flakes as you want. I added about a teaspoon since the kids were eating this. If making for my wife and I, I would have doubled that.
  • Simmer gently for at least a half hour (if time allows) to mellow the tomato out and blend the flavors. This can be simmered for as little as 10 minutes, but the tomato flavor will be sharper if cooked quickly.
  • If fresh basil is available, I would chiffonade and add a nice small handful (maybe 1/2 cup) at the very end just before serving.
Serve over penne or any chunky shaped pasta.

This served our family of four with plenty of leftover sauce.